部署 headscale 及 使用内嵌 derp server

推荐使用 docker compose进行部署,方便、简单。

headscale支持使用IP以及域名进行连接,推荐使用 域名 + https 的方式,使用 ip 部署的情况下,tailscale客户端在重新登入的时候会自动转到 https 方式,导致登入失败。

1
2
3
4
5
6
7
8
9
10
11
12
13
14
version: '3.5'
services:
headscale:
image: headscale/headscale:stable
container_name: headscale
network_mode: host
volumes:
- ./container-config:/etc/headscale
- ./container-data/data:/var/lib/headscale
- /home/headscale/container-cert:/home/cert
# ports:
# - 27896:8080
command: serve
restart: always

其中 ./container-config 目录放置 config 文件。config 配置文件配置如下:

1
2
3
4
5
6
7
8
9
10
11
12
13
14
15
16
17
18
19
20
21
22
23
24
25
26
27
28
29
30
31
32
33
34
35
36
37
38
39
40
41
42
43
44
45
46
47
48
49
50
51
52
53
54
55
56
57
58
59
60
61
62
63
64
65
66
67
68
69
70
71
72
73
74
75
76
77
78
79
80
81
82
83
84
85
86
87
88
89
90
91
92
93
94
95
96
97
98
99
100
101
102
103
104
105
106
107
108
109
110
111
112
113
114
115
116
117
118
119
120
121
122
123
124
125
126
127
128
129
130
131
132
133
134
135
136
137
138
139
140
141
142
143
144
145
146
147
148
149
150
151
152
153
154
155
156
157
158
159
160
161
162
163
164
165
166
167
168
169
170
171
172
173
174
175
176
177
178
179
180
181
182
183
184
185
186
187
188
189
190
191
192
193
194
195
196
197
198
199
200
201
202
203
204
205
206
207
208
209
210
211
212
213
214
215
216
217
218
219
220
221
222
223
224
225
226
227
228
229
230
231
232
233
234
235
236
237
238
239
240
241
242
243
244
245
246
247
248
249
250
251
252
253
254
255
256
257
258
259
260
261
262
263
264
265
266
267
268
269
270
271
272
273
274
275
276
277
278
279
280
281
282
283
284
285
286
287
288
289
290
291
292
293
294
295
296
297
298
299
300
301
302
303
304
305
306
307
308
309
310
311
312
313
314
315
316
317
318
319
320
321
322
323
324
325
326
327
328
329
330
331
332
333
334
335
336
337
338
339
340
341
342
343
344
345
346
347
348
349
350
351
352
353
354
355
356
357
358
359
360
361
362
363
364
365
366
367
368
369
370
371
372
373
374
375
376
377
378
379
380
381
382
383
384
385
386
387
388
389
390
391
392
393
394
395
396
397
398
399
400
401
402
403
404
405
406
407
---
# headscale will look for a configuration file named `config.yaml` (or `config.json`) in the following order:
#
# - `/etc/headscale`
# - `~/.headscale`
# - current working directory

# The url clients will connect to.
# Typically this will be a domain like:
#
# https://myheadscale.example.com:443
#
server_url: https://xxx.ownding.xyz:9999

# Address to listen to / bind to on the server
#
# For production:
# listen_addr: 0.0.0.0:8080
listen_addr: 0.0.0.0:8080

# Address to listen to /metrics, you may want
# to keep this endpoint private to your internal
# network
#
metrics_listen_addr: 0.0.0.0:9090

# Address to listen for gRPC.
# gRPC is used for controlling a headscale server
# remotely with the CLI
# Note: Remote access _only_ works if you have
# valid certificates.
#
# For production:
# grpc_listen_addr: 0.0.0.0:50443
grpc_listen_addr: 0.0.0.0:50443

# Allow the gRPC admin interface to run in INSECURE
# mode. This is not recommended as the traffic will
# be unencrypted. Only enable if you know what you
# are doing.
grpc_allow_insecure: false

# The Noise section includes specific configuration for the
# TS2021 Noise protocol
noise:
# The Noise private key is used to encrypt the
# traffic between headscale and Tailscale clients when
# using the new Noise-based protocol.
private_key_path: /var/lib/headscale/noise_private.key

# List of IP prefixes to allocate tailaddresses from.
# Each prefix consists of either an IPv4 or IPv6 address,
# and the associated prefix length, delimited by a slash.
# It must be within IP ranges supported by the Tailscale
# client - i.e., subnets of 100.64.0.0/10 and fd7a:115c:a1e0::/48.
# See below:
# IPv6: https://github.com/tailscale/tailscale/blob/22ebb25e833264f58d7c3f534a8b166894a89536/net/tsaddr/tsaddr.go#LL81C52-L81C71
# IPv4: https://github.com/tailscale/tailscale/blob/22ebb25e833264f58d7c3f534a8b166894a89536/net/tsaddr/tsaddr.go#L33
# Any other range is NOT supported, and it will cause unexpected issues.
prefixes:
v4: 100.64.0.0/10
v6: fd7a:115c:a1e0::/48

# Strategy used for allocation of IPs to nodes, available options:
# - sequential (default): assigns the next free IP from the previous given IP.
# - random: assigns the next free IP from a pseudo-random IP generator (crypto/rand).
allocation: sequential

# DERP is a relay system that Tailscale uses when a direct
# connection cannot be established.
# https://tailscale.com/blog/how-tailscale-works/#encrypted-tcp-relays-derp
#
# headscale needs a list of DERP servers that can be presented
# to the clients.
derp:
server:
# If enabled, runs the embedded DERP server and merges it into the rest of the DERP config
# The Headscale server_url defined above MUST be using https, DERP requires TLS to be in place
enabled: true

# Region ID to use for the embedded DERP server.
# The local DERP prevails if the region ID collides with other region ID coming from
# the regular DERP config.
region_id: 999

# Region code and name are displayed in the Tailscale UI to identify a DERP region
region_code: "headscale"
region_name: "Headscale Embedded DERP"

# Listens over UDP at the configured address for STUN connections - to help with NAT traversal.
# When the embedded DERP server is enabled stun_listen_addr MUST be defined.
#
# For more details on how this works, check this great article: https://tailscale.com/blog/how-tailscale-works/
stun_listen_addr: "0.0.0.0:3478"

# Private key used to encrypt the traffic between headscale DERP
# and Tailscale clients.
# The private key file will be autogenerated if it's missing.
#
private_key_path: /var/lib/headscale/derp_server_private.key

# This flag can be used, so the DERP map entry for the embedded DERP server is not written automatically,
# it enables the creation of your very own DERP map entry using a locally available file with the parameter DERP.paths
# If you enable the DERP server and set this to false, it is required to add the DERP server to the DERP map using DERP.paths
automatically_add_embedded_derp_region: true

# For better connection stability (especially when using an Exit-Node and DNS is not working),
# it is possible to optionally add the public IPv4 and IPv6 address to the Derp-Map using:
ipv4: 18.138.24.182
ipv6: 2406:da18:d4c:c000:8d2b:1775:f73f:7c2f

# List of externally available DERP maps encoded in JSON
urls:
# - https://controlplane.tailscale.com/derpmap/default

# Locally available DERP map files encoded in YAML
#
# This option is mostly interesting for people hosting
# their own DERP servers:
# https://tailscale.com/kb/1118/custom-derp-servers/
#
# paths:
# - /etc/headscale/derp-example.yaml
paths:
# - /etc/headscale/derp.yaml
# - /etc/headscale/derp2.yaml

# If enabled, a worker will be set up to periodically
# refresh the given sources and update the derpmap
# will be set up.
auto_update_enabled: true

# How often should we check for DERP updates?
update_frequency: 24h

# Disables the automatic check for headscale updates on startup
disable_check_updates: false

# Time before an inactive ephemeral node is deleted?
ephemeral_node_inactivity_timeout: 30m

database:
# Database type. Available options: sqlite, postgres
# Please note that using Postgres is highly discouraged as it is only supported for legacy reasons.
# All new development, testing and optimisations are done with SQLite in mind.
type: sqlite

# Enable debug mode. This setting requires the log.level to be set to "debug" or "trace".
debug: false

# GORM configuration settings.
gorm:
# Enable prepared statements.
prepare_stmt: true

# Enable parameterized queries.
parameterized_queries: true

# Skip logging "record not found" errors.
skip_err_record_not_found: true

# Threshold for slow queries in milliseconds.
slow_threshold: 1000

# SQLite config
sqlite:
path: /var/lib/headscale/db.sqlite

# Enable WAL mode for SQLite. This is recommended for production environments.
# https://www.sqlite.org/wal.html
write_ahead_log: true

# Maximum number of WAL file frames before the WAL file is automatically checkpointed.
# https://www.sqlite.org/c3ref/wal_autocheckpoint.html
# Set to 0 to disable automatic checkpointing.
wal_autocheckpoint: 1000

# # Postgres config
# Please note that using Postgres is highly discouraged as it is only supported for legacy reasons.
# See database.type for more information.
# postgres:
# # If using a Unix socket to connect to Postgres, set the socket path in the 'host' field and leave 'port' blank.
# host: localhost
# port: 5432
# name: headscale
# user: foo
# pass: bar
# max_open_conns: 10
# max_idle_conns: 10
# conn_max_idle_time_secs: 3600

# # If other 'sslmode' is required instead of 'require(true)' and 'disabled(false)', set the 'sslmode' you need
# # in the 'ssl' field. Refers to https://www.postgresql.org/docs/current/libpq-ssl.html Table 34.1.
# ssl: false

### TLS configuration
#
## Let's encrypt / ACME
#
# headscale supports automatically requesting and setting up
# TLS for a domain with Let's Encrypt.
#
# URL to ACME directory
acme_url: https://acme-v02.api.letsencrypt.org/directory

# Email to register with ACME provider
acme_email: ""

# Domain name to request a TLS certificate for:
tls_letsencrypt_hostname: ""

# Path to store certificates and metadata needed by
# letsencrypt
# For production:
tls_letsencrypt_cache_dir: /var/lib/headscale/cache

# Type of ACME challenge to use, currently supported types:
# HTTP-01 or TLS-ALPN-01
# See: docs/ref/tls.md for more information
tls_letsencrypt_challenge_type: HTTP-01
# When HTTP-01 challenge is chosen, letsencrypt must set up a
# verification endpoint, and it will be listening on:
# :http = port 80
tls_letsencrypt_listen: ":http"

## Use already defined certificates:
tls_cert_path: ""
tls_key_path: ""

log:
# Output formatting for logs: text or json
format: text
level: info

## Policy
# headscale supports Tailscale's ACL policies.
# Please have a look to their KB to better
# understand the concepts: https://tailscale.com/kb/1018/acls/
policy:
# The mode can be "file" or "database" that defines
# where the ACL policies are stored and read from.
mode: file
# If the mode is set to "file", the path to a
# HuJSON file containing ACL policies.
path: /etc/headscale/acl.json

## DNS
#
# headscale supports Tailscale's DNS configuration and MagicDNS.
# Please have a look to their KB to better understand the concepts:
#
# - https://tailscale.com/kb/1054/dns/
# - https://tailscale.com/kb/1081/magicdns/
# - https://tailscale.com/blog/2021-09-private-dns-with-magicdns/
#
# Please note that for the DNS configuration to have any effect,
# clients must have the `--accept-dns=true` option enabled. This is the
# default for the Tailscale client. This option is enabled by default
# in the Tailscale client.
#
# Setting _any_ of the configuration and `--accept-dns=true` on the
# clients will integrate with the DNS manager on the client or
# overwrite /etc/resolv.conf.
# https://tailscale.com/kb/1235/resolv-conf
#
# If you want stop Headscale from managing the DNS configuration
# all the fields under `dns` should be set to empty values.
dns:
# Whether to use [MagicDNS](https://tailscale.com/kb/1081/magicdns/).
magic_dns: true

# Defines the base domain to create the hostnames for MagicDNS.
# This domain _must_ be different from the server_url domain.
# `base_domain` must be a FQDN, without the trailing dot.
# The FQDN of the hosts will be
# `hostname.base_domain` (e.g., _myhost.example.com_).
base_domain: example.com

# List of DNS servers to expose to clients.
nameservers:
global:
- 1.1.1.1
- 1.0.0.1
- 2606:4700:4700::1111
- 2606:4700:4700::1001

# NextDNS (see https://tailscale.com/kb/1218/nextdns/).
# "abc123" is example NextDNS ID, replace with yours.
# - https://dns.nextdns.io/abc123

# Split DNS (see https://tailscale.com/kb/1054/dns/),
# a map of domains and which DNS server to use for each.
split:
{}
# foo.bar.com:
# - 1.1.1.1
# darp.headscale.net:
# - 1.1.1.1
# - 8.8.8.8

# Set custom DNS search domains. With MagicDNS enabled,
# your tailnet base_domain is always the first search domain.
search_domains: []

# Extra DNS records
# so far only A and AAAA records are supported (on the tailscale side)
# See: docs/ref/dns.md
extra_records: []
# - name: "grafana.myvpn.example.com"
# type: "A"
# value: "100.64.0.3"
#
# # you can also put it in one line
# - { name: "prometheus.myvpn.example.com", type: "A", value: "100.64.0.3" }
#
# Alternatively, extra DNS records can be loaded from a JSON file.
# Headscale processes this file on each change.
# extra_records_path: /var/lib/headscale/extra-records.json

# Unix socket used for the CLI to connect without authentication
# Note: for production you will want to set this to something like:
unix_socket: /var/run/headscale/headscale.sock
unix_socket_permission: "0770"
#
# headscale supports experimental OpenID connect support,
# it is still being tested and might have some bugs, please
# help us test it.
# OpenID Connect
# oidc:
# only_start_if_oidc_is_available: true
# issuer: "https://your-oidc.issuer.com/path"
# client_id: "your-oidc-client-id"
# client_secret: "your-oidc-client-secret"
# # Alternatively, set `client_secret_path` to read the secret from the file.
# # It resolves environment variables, making integration to systemd's
# # `LoadCredential` straightforward:
# client_secret_path: "${CREDENTIALS_DIRECTORY}/oidc_client_secret"
# # client_secret and client_secret_path are mutually exclusive.
#
# # The amount of time from a node is authenticated with OpenID until it
# # expires and needs to reauthenticate.
# # Setting the value to "0" will mean no expiry.
# expiry: 180d
#
# # Use the expiry from the token received from OpenID when the user logged
# # in, this will typically lead to frequent need to reauthenticate and should
# # only been enabled if you know what you are doing.
# # Note: enabling this will cause `oidc.expiry` to be ignored.
# use_expiry_from_token: false
#
# # Customize the scopes used in the OIDC flow, defaults to "openid", "profile" and "email" and add custom query
# # parameters to the Authorize Endpoint request. Scopes default to "openid", "profile" and "email".
#
# scope: ["openid", "profile", "email", "custom"]
# extra_params:
# domain_hint: example.com
#
# # List allowed principal domains and/or users. If an authenticated user's domain is not in this list, the
# # authentication request will be rejected.
#
# allowed_domains:
# - example.com
# # Note: Groups from keycloak have a leading '/'
# allowed_groups:
# - /headscale
# allowed_users:
# - alice@example.com
#
# # Optional: PKCE (Proof Key for Code Exchange) configuration
# # PKCE adds an additional layer of security to the OAuth 2.0 authorization code flow
# # by preventing authorization code interception attacks
# # See https://datatracker.ietf.org/doc/html/rfc7636
# pkce:
# # Enable or disable PKCE support (default: false)
# enabled: false
# # PKCE method to use:
# # - plain: Use plain code verifier
# # - S256: Use SHA256 hashed code verifier (default, recommended)
# method: S256
#
# # Map legacy users from pre-0.24.0 versions of headscale to the new OIDC users
# # by taking the username from the legacy user and matching it with the username
# # provided by the OIDC. This is useful when migrating from legacy users to OIDC
# # to force them using the unique identifier from the OIDC and to give them a
# # proper display name and picture if available.
# # Note that this will only work if the username from the legacy user is the same
# # and there is a possibility for account takeover should a username have changed
# # with the provider.
# # When this feature is disabled, it will cause all new logins to be created as new users.
# # Note this option will be removed in the future and should be set to false
# # on all new installations, or when all users have logged in with OIDC once.
# map_legacy_users: false

# Logtail configuration
# Logtail is Tailscales logging and auditing infrastructure, it allows the control panel
# to instruct tailscale nodes to log their activity to a remote server.
logtail:
# Enable logtail for this headscales clients.
# As there is currently no support for overriding the log server in headscale, this is
# disabled by default. Enabling this will make your clients send logs to Tailscale Inc.
enabled: false

# Enabling this option makes devices prefer a random port for WireGuard traffic over the
# default static port 41641. This option is intended as a workaround for some buggy
# firewall devices. See https://tailscale.com/kb/1181/firewalls/ for more information.
randomize_client_port: true

上面的配置,部署 headscale 的同时,也开启了 headscale 内嵌的 derp 服务。 derp.server.enable 设置成 trueipv4设置成你服务器的IP。server_url: https://xxx.ownding.xyz:9999 填写服务器的域名及端口,端口可自行确定。

比如我使用的是 9999 端口,那么需要在服务器防火墙以及云服务商的安全组里放行 9999 端口,同时需要放行 3478 tcp/udp端口。这两个端口放行后,部署完毕就可以正常使用 headscale 服务了。headscale 服务端部署后,客户端使用 tailscale 的客户端,可从 tailscale 官网下载对应的版本。

derp server 配置

使用 docker 部署 derp server,同时修改 headscale 的配置文件。

docker 镜像:ghcr.io/yangchuansheng/derper:latest

修改的内容如下:

1
2
3
4
5
6
7
8
9
10
11
12
13
14
15
16
17
18
19
20
21
22
23
24
25
26
27
28
29
30
31
32
33
34
35
36
37
38
39
40
41
42
43
44
45
46
47
48
49
50
51
52
derp:
server:
# If enabled, runs the embedded DERP server and merges it into the rest of the DERP config
# The Headscale server_url defined above MUST be using https, DERP requires TLS to be in place
enabled: false

# Region ID to use for the embedded DERP server.
# The local DERP prevails if the region ID collides with other region ID coming from
# the regular DERP config.
region_id: 999

# Region code and name are displayed in the Tailscale UI to identify a DERP region
region_code: "headscale"
region_name: "Headscale Embedded DERP"

# Listens over UDP at the configured address for STUN connections - to help with NAT traversal.
# When the embedded DERP server is enabled stun_listen_addr MUST be defined.
#
# For more details on how this works, check this great article: https://tailscale.com/blog/how-tailscale-works/
stun_listen_addr: "0.0.0.0:3478"

# Private key used to encrypt the traffic between headscale DERP
# and Tailscale clients.
# The private key file will be autogenerated if it's missing.
#
private_key_path: /var/lib/headscale/derp_server_private.key

# This flag can be used, so the DERP map entry for the embedded DERP server is not written automatically,
# it enables the creation of your very own DERP map entry using a locally available file with the parameter DERP.paths
# If you enable the DERP server and set this to false, it is required to add the DERP server to the DERP map using DERP.paths
automatically_add_embedded_derp_region: true

# For better connection stability (especially when using an Exit-Node and DNS is not working),
# it is possible to optionally add the public IPv4 and IPv6 address to the Derp-Map using:
ipv4: 18.138.24.182
ipv6: 2406:da18:d4c:c000:8d2b:1775:f73f:7c2f

# List of externally available DERP maps encoded in JSON
urls:
# - https://controlplane.tailscale.com/derpmap/default

# Locally available DERP map files encoded in YAML
#
# This option is mostly interesting for people hosting
# their own DERP servers:
# https://tailscale.com/kb/1118/custom-derp-servers/
#
# paths:
# - /etc/headscale/derp-example.yaml
paths:
- /etc/headscale/derp.yaml
- /etc/headscale/derp2.yaml

derp.server.enable 设置成 false,同时在 paths 引入 derp 的配置。如果有两台 derp server,可以引入两台,如果只有一台,那么就引入一个配置即可。

config.yamlderp.yaml 示例:

1
2
3
4
5
6
7
8
9
10
11
12
13
14
# /etc/headscale/derp.yaml
regions:
901:
regionid: 901
regioncode: hw-sg
regionname: hw-singapore
nodes:
- name: 901a
regionid: 901
hostname: xxx2.ownding.xyz
ipv4: 112.129.223.33
stunport: 3478
stunonly: false
derpport: 12345

config.yamlderp2.yaml 示例:

1
2
3
4
5
6
7
8
9
10
11
12
13
14
# /etc/headscale/derp.yaml
regions:
902:
regionid: 902
regioncode: hw-sh
regionname: hw-shanghai
nodes:
- name: 902a
regionid: 902
hostname: xxx3.ownding.xyz
ipv4: 184.170.27.98
stunport: 3478
stunonly: false
derpport: 12345

derp.yamlderp2.yaml 放置在服务器 ./container-config 目录下(docker-compose.yaml中的挂载目录)。

derp server 服务器开放 3478/udp12345/tcp 端口。

重启 headscale 服务即可。

使用git submodule实现代码权限管控方案

1、问题及目的

“程序A” 是一个 多模块 的Spring Boot 项目,为了防止代码泄露,需要加强对代码的管控。

2、解决方案

针对代码可能存在的泄漏风险,现提出两种解决方案:

  1. 将现有 “程序A” 后端的代码按模块分拆成一个个项目,相关人员只能拥有其权限内的项目(模块),不能接触到其它项目(模块)。该方案成本低,操作简单,虽然降低了整体代码泄漏的风险,但是模块代码泄漏的风险依旧存在。开发人员现有电脑配置不变,但是电脑需要进行域控管理。
  2. 在IDC配置开发服务器,为每个开发人员配置16G内存、4核CPU、80G硬盘Ubuntu虚拟机,同时更换开发人员现有的办公电脑,降低电脑配置节省电脑租赁费用。所有开发人员的开发工作均通过浏览器访问各自的开发虚拟机的开发工具进行开发,开发人员无法直接接触代码文件。该方案大大降低了代码泄漏的风险,但是实施成本高。为了防止办公电脑私自安装盗版软件,可对办公电脑进行域控管理。

2.1、模块拆分方案

“程序A” 后端模块拆分在保证开发人员权限管控的前提下,考虑开发人员操作习惯及开发效率。

经综合考虑,在不破坏 “程序A” 后端代码结构的前提下,使用Git submodule功能实现开发人员权限管控。

前端代码暂时不考虑进行权限管控,凡是前端开发均拥有整个前端代码的修改权限。

后端拆分示例图

图1 “程序A”后端拆分示例图

拆分方法:

  1. 将”程序A”后端除imes_commonimes_common_modelimes_eureka三个模块外,其余模块按整个模块一个项目移到同imes-parent同级的目录。移除多余模块的imes-parent项目变成imes-application项目。在Gitlab中新建imes-application项目,将本地imes-application所有文件上传到Gitlab中。注意:不要删减任何文件。
  2. 在Gitlab中新建imes-dev项目,将整个移动到外部目录的imes_dev文件上传到imes-dev项目中。注意:不要删减修改任何文件。
  3. 按照imes_dev步骤,对其它模块进行相同的操作。
  4. imes-application模块所有开发人员均有权限访问;其它模块按管理要求分配相应的开发人员。

总结:整个”程序A”后端拆分不涉及对文件的删除修改,拆分过程方便快速。

开发人员开发方法说明:

情形:开发人员A拥有imes-applicationimes-system两个项目的权限,但是没有其它模块的权限

  1. 开发人员A使用新账号将imes-application克隆到自己的开发电脑上。
  2. 开发人员A进入到imes-application文件夹,然后使用 git submodule add http://url/user/imes-system.git imes_system 命令将imes-system代码拉取到本地imes-application目录中。等待编译器索引完成即可正常开发调试,使用方法同现有后端开发方式。

2.1.1、模块拆分举例

本案例已”程序B”拆分为例,为了方便起见,整个”程序B”只保留四个模块:imes_commonimes_common_modelimes_eurekaimes_system作举例说明。

1、将”程序B”按照前文所述的方法拆分成imes-console-commonimes-console-eurekaimes-console-system三个项目。每个项目文件均不要进行修改删除操作。imes-console-common包含imes_commonimes_common_model两个模块。

拆分示例

图2 “程序B”拆分示例

2、将imes-console-common项目添加systemeureka两个submodule后并提交后,将在imes-console-common项目中看到两个子模块信息。

添加子模块后项目信息

图3 添加子模块后项目信息

3、开发人员A拥有imes-console-commonimes-console-eureka两个项目的权限,虽然他可以看到项目中imes_system目录的显示,但是当他点imes-console-common项目的imes_system时,会提示找不到相关页面从而达到代码管控的目的。

项目内代码管控

图4 项目内代码管控

2.1.2、Jenkins打包

由于”程序A”项目整体结构并没有变化,Jekins打包方式基本不变,不过有两处变化。

1、Jenkinsfile中新增一行:sh 'git submodule update --init --recursive'

Jenkinsfile修改

图5 Jenkinsfile修改

2、Jenkins中项目打包配置修改,如下图:

Jenkins中打包配置新增子模块选项

图6 Jenkins中打包配置新增子模块选项

Jenkins打包测试

图7 Jenkins打包测试

2.2、方案1说明(模块拆分+本地化开发)

1、开发人员保持现有开发环境不变。

2、管理人员将”程序A”后端代码按照模块进行分离,每个模块即是一个项目。

3、管理人员对项目(模块)进行授权,每个项目只授权给对应的开发人员,其他开发人员无法查看、下载。

4、管理人员取消开发人员原有”程序A”后端的代码权限。

5、开发人员拉取各自项目的代码到本地笔记上进行开发。

6、开发人员电脑需要进行域控管理。

本地化开发

图8 本地化开发

2.3、方案2说明(模块拆分+服务器化开发)

1、运维人员根据需要购买”程序A”开发服务器。

2、运维人员配置开发服务器(系统选用Ubuntu20.04 LTS桌面版,管理员权限禁用SSH),安装好开发工具IDEA ProjectorCode-Server

3、管理人员将”程序A”后端代码按照模块进行分离,每个模块即是一个项目。

4、管理人员对项目(模块)进行授权,每个项目只授权给对应的开发人员,其他开发人员无法查看、下载。

5、管理人员取消开发人员原有”程序A”后端的代码权限。

6、运维人员收回开发人员32G内存的机器,改成租赁16G内存的机器。

7、运维人员给每个开发人员分配开发虚拟机,以及浏览器访问链接。

8、运维人员搭建开发k8s,部署”程序A”。

9、开发人员在办公电脑的浏览器上进行开发工作。如果人员居家办公需要使用VPN连入公司内网进行开发工作。

网页版IDEA

图9 网页版IDEA

浏览器上进行后端开发工作

图10 浏览器上进行后端开发工作

浏览器上进行前端开发工作

图11 浏览器上进行前端开发工作

开发服务器安装的系统

图12 开发服务器安装的系统(注:开发人员无法访问服务器,只能通过浏览器访问开发工具)

服务器化开发示意图

图13 服务器化开发示意图

开发服务器网络说明

图14 开发服务器网络说明

2.4、方案3说明(模块拆分+服务器化开发)

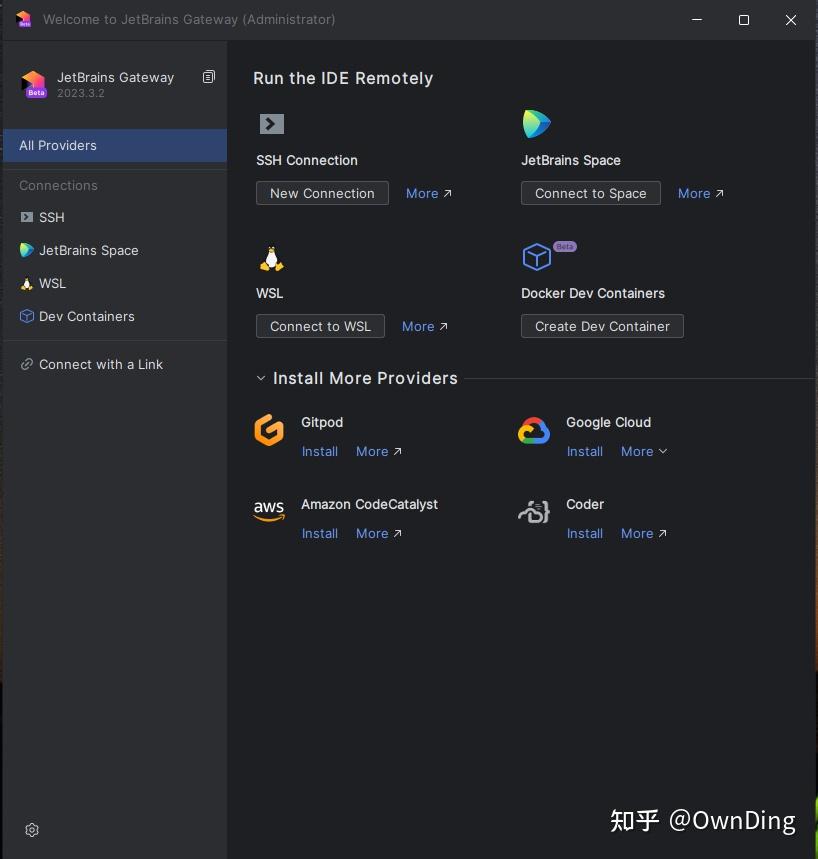
同方案2(需要启用SSH),将Projector替换成 JetBrains Gateway,实现相同的效果。使用Gateway时需要在本地电脑安装该软件,使用SSH连接到远程电脑。平常开发同本地使用IDEA一样。

前端开发采用VS Code Remote的开发方式。开发人员同样使用本地VS Code编辑器SSH方式连接到远程电脑。

下载地址:

JetBrains Gateway - Remote Development for JetBrains IDEs

本方案同方案2一样不会将远程代码复制到开发人员电脑上。

要求:

  1. 需要运维人员事先在服务器中配置好GitJavaNode.js等环境,并且将特定开发人员的Git密码事先登入。
  2. 需要运维人员在开发人员电脑上实现配置好Gateway及SSH登入密码。
  3. 服务器账户密码、Git账户密码不告知开发人员。
  4. 代码服务器需每天备份。
  5. 开发人员一人一台远程服务器。运维人员在给开发人员配置好系统环境、开发环境后需要对服务器进行快照备份,在出现意外时可快速恢复开发环境。
  6. 运维人员需制作基础服务器镜像或快照,可以在开发人员入职后快速的部署开发环境。减少人员搭建开发环境的时间或者更换电脑重新搭建开发环境的时间。

Gateway远程开发

图15 Gateway远程开发

同本地开发体验基本一致

图16 同本地开发体验基本一致

可同时打开多个IDEA窗口

图17 可同时打开多个IDEA窗口

2.5、方案4说明(服务器化开发)

同方案3,但是不进行模块拆分(即”程序A”后端仍旧是一个工程,不按模块进行工程拆分了)。这样的好处是节省了模块拆分的麻烦、消除了模块拆分后开发人员隐形增加的调试程序的时间成本,同时开发体验同现有开发人员习惯完全一致。

不拆分模块,远程流畅调试”程序A”后端

图18 不拆分模块,远程流畅调试”程序A”后端

3、方案对比

方案1(模块拆分+本地化开发) 方案2/3 方案4
安全性
方案实施便利性
花费 高(按30 ~ 40开发人员统计,预估服务器花销6 ~ 10万,同时电脑租赁可节省2万/年) 高(按30 ~ 40开发人员统计,预估服务器花销6 ~ 10万,同时电脑租赁可节省2万/年)
开发便利性
开发工具费用 无(但是IDEA、数据库工具很多是破解版) 无(IDEA社区版、Code-Server、Ubuntu系统均免费) 可能需要付费IDEA工具
办公/开发电脑域控 需要 不需要 不需要
居家办公 支持 支持 支持
出差 支持 支持(需网络) 支持(需网络)
开发工具插件支持 支持 支持 支持
开发环境统一性
风险点 开发工具使用了很多破解软件 大量人员在服务器上开发可能导致服务器卡顿,影响开发效率;需要高速的内网网络。网络延迟等会影响开发效率。代码等均在服务器,如果服务器突然故障等会导致开发人员无法工作。 大量人员在服务器上开发可能导致服务器卡顿,影响开发效率;需要高速的内网网络。网络延迟等会影响开发效率。代码等均在服务器,如果服务器突然故障等会导致开发人员无法工作。

4、方案选择

方案1相对其它方案安全性较低。方案2使用Projector操作流畅度不行,相比方案3、4操作不够流畅,体验感不佳,多IDEA窗口操作繁琐。综合方案1、2、3、4,建议选用方案3

各云厂商轻量云服务器的另类用法

一、场景创新:当轻量云遇上全球IP需求

在云计算普及的今天,2核2G内存的Windows Server轻量云服务器正成为技术爱好者的新宠。这类产品独特的按天计费模式 (实际是按月收费,但是使用完毕退订服务器是按天收费,如阿里云1.5元/天、腾讯云1.3元/天),配合全球数据中心布局,意外地成为了获取多地域IP地址的高效工具。通过在云端构建临时Windows工作站,用户可快速获取美国、新加坡、欧洲等地的IP资源,满足跨境电商、SEO优化、网络研究等特殊需求。

二、厂商产品横向评测

云厂商 基础配置 包月价格 数据中心分布 Windows支持 特色功能
阿里云 2核2G/ 54元 全球20+区 ✔️ 自动快照备份
腾讯云 2核2G/ 44元 全球15+区 ✔️ 一键重装系统

注:价格为大致折算人民币月费,实际以厂商官网为准

腾讯轻量云

三、实战操作全流程

1. 账号准备阶段

  • 注册时绑定支付宝/微信(国内厂商)
  • 设置支付密码防误操作

2. 浏览器环境优化

  • 安装Chrome便携版(免更新困扰)
  • 设置临时书签同步(Edge浏览器同步功能)

4. IP资源利用策略

  • 跨境电商:多账号防关联(亚马逊店铺矩阵)
  • 内容采集:突破地域限制抓取海外数据
  • 广告测试:验证不同地区广告投放效果
  • 网络研究:进行合法的渗透测试(需授权)
  • 资料查找:查找工作/学习中所需的文献资料

四、使用

直接使用 windows 自带的远程桌面连接到 服务器即可。
由于远程端口在公网开放,请将服务器密码设置的复杂点。对网络安全方便不熟悉的用户,在使用完毕后可以直接关闭服务器或退订。

五、问题处理

腾讯、阿里轻量云海外服务器购买后,经常出现”服务器创建“失败的情况,直接”工单“联系售后。

  • 1、使用 Cassandra:3.0.9 镜像

  • 2、cd /opt/cassandra/bin/

目录

  • 3、全量备份,执行:nodetool snapshot

备份

程序会自动在每张表下生成备份时间戳的文件夹,里面有备份文件。
备份单个keyspace执行:nodetool snapshot yourkeyspace

  • 4、启用增量备份
    启用:nodetool enablebackup
    查看状态:nodetool statusbackup

增量备份

  • 5、删除快照
    命令:nodetool clearsnapshot

删除

  • 6、备份恢复
    将备份目录下的文件复制到 表目录下:
    cp /var/lib/cassandra/data/thingsboard/ts_kv_latest_cf-49f924507df811eeaf8a3b94212b0656/snapshots/1699939125001/* /var/lib/cassandra/data/thingsboard/ts_kv_latest_cf-49f924507df811eeaf8a3b94212b0656/

备份

备份2

再执行恢复命令:
nodetool refresh -- yourkeyspace yourtable

恢复

当我们部署了 headscale 以及 headscale UI等程序,需要对 headscale 及UI 进行代理。本文使用nginx进行代理。

headscale ui相关的开源程序,推荐使用 headscale-admin,界面美观,功能较丰富,使用较简单,只要启动容器即可。

1
2
3
4
5
6
7
8
9
10
11
12
13
14
15
16
17
18
19
20
21
22
23
24
25
26
27
28
29
30
31
32
33
34
35
36
37
38
39
40
41
42
43
44
45
46
47
48
49
50
51
52
53
54
55
56
57
58
59
60
61
62
63
64
65
66
67
68
69
70
71
72
73
74
75
76
77
78
79
80
81
82
83
84
85
86
87
88
89
90
91
92
93
94
95
96
97
98
99
100
101
102
103
104
105
106
107
108
109
110
111
112
113
114
user  root;
worker_processes auto;

events {
worker_connections 1024;
}

http {
include mime.types;
default_type application/octet-stream;
access_log /var/log/nginx/nginx-access.log;
error_log /var/log/nginx/nginx-error.log;
log_format main '$remote_addr - $remote_user [$time_local] "$request" '
'$status $body_bytes_sent "$http_referer" '
'"$http_user_agent" "$http_x_forwarded_for"';


sendfile on;

keepalive_timeout 65;

gzip on;
gzip_static on;

proxy_buffer_size 128k;
proxy_buffers 32 128k;
proxy_busy_buffers_size 128k;

fastcgi_buffers 8 128k;
send_timeout 60;

server {
listen 8088 ssl;
server_name xxx.ownding.xyz;
ssl_certificate /home/headscale/cert/xxx.ownding.xyz.crt;
ssl_certificate_key /home/headscale/cert/xxx.ownding.xyz.key;
ssl_session_cache shared:le_nginx_SSL:1m;
ssl_session_timeout 1440m;
ssl_protocols TLSv1 TLSv1.1 TLSv1.2 TLSv1.3;
ssl_prefer_server_ciphers on;
ssl_ciphers TLS13-AES-256-GCM-SHA384:TLS13-CHACHA20-POLY1305-SHA256:TLS13-AES-128-GCM-SHA256:TLS13-AES-128-CCM-8-SHA256:TLS13-AES-128-CCM-SHA256:EECDH+CHACHA20:EECDH+CHACHA20-draft:EECDH+ECDSA+AES128:EECDH+aRSA+AES128:RSA+AES128:EECDH+ECDSA+AES256:EECDH+aRSA+AES256:RSA+AES256:EECDH+ECDSA+3DES:EECDH+aRSA+3DES:RSA+3DES:!MD5;

# add_header X-Frame-Options "SAMEORIGIN";
# add_header X-XSS-Protection "1; mode=block";
# add_header X-Content-Type-Options "nosniff";

location / {
proxy_pass http://172.26.0.93:8080; # Headscale的HTTP端口
proxy_http_version 1.1;
proxy_set_header Upgrade $http_upgrade;
proxy_set_header Connection "upgrade";
proxy_set_header Host $host;
proxy_redirect http:// https://;
proxy_buffering off;
proxy_set_header X-Real-IP $remote_addr;
proxy_set_header X-Forwarded-For $proxy_add_x_forwarded_for;
proxy_set_header X-Forwarded-Proto $http_x_forwarded_proto;
add_header Strict-Transport-Security "max-age=15552000; includeSubDomains" always;

# CORS-Handling
if ($request_method = OPTIONS) {
add_header 'Access-Control-Allow-Origin' '*' always;
add_header 'Access-Control-Allow-Methods' 'GET, POST, DELETE, OPTIONS' always;
add_header 'Access-Control-Allow-Headers' 'Authorization, Content-Type, User-Agent' always;
add_header 'Access-Control-Expose-Headers' 'Content-Length, Content-Range' always;
add_header 'Content-Length' 0 always;
add_header 'Content-Type' 'text/plain; charset=utf-8' always;
return 204;
}

# CORS-Header
add_header 'Access-Control-Allow-Origin' '*' always;
add_header 'Access-Control-Allow-Methods' 'GET, POST, DELETE, OPTIONS' always;
add_header 'Access-Control-Allow-Headers' 'Authorization, Content-Type, User-Agent' always;
add_header 'Access-Control-Expose-Headers' 'Content-Length, Content-Range' always;
}

location /admin {
proxy_pass http://172.26.0.93:8443; # Headscale admin的HTTP端口
proxy_http_version 1.1;
proxy_set_header Upgrade $http_upgrade;
proxy_set_header Connection "upgrade";
proxy_set_header Host $host;
proxy_redirect http:// https://;
proxy_buffering off;
proxy_set_header X-Real-IP $remote_addr;
proxy_set_header X-Forwarded-For $proxy_add_x_forwarded_for;
proxy_set_header X-Forwarded-Proto $http_x_forwarded_proto;
add_header Strict-Transport-Security "max-age=15552000; includeSubDomains" always;

# CORS-Handling
if ($request_method = OPTIONS) {
add_header 'Access-Control-Allow-Origin' '*' always;
add_header 'Access-Control-Allow-Methods' 'GET, POST, DELETE, OPTIONS' always;
add_header 'Access-Control-Allow-Headers' 'Authorization, Content-Type, User-Agent' always;
add_header 'Access-Control-Expose-Headers' 'Content-Length, Content-Range' always;
add_header 'Content-Length' 0 always;
add_header 'Content-Type' 'text/plain; charset=utf-8' always;
return 204;
}

# CORS-Header
add_header 'Access-Control-Allow-Origin' '*' always;
add_header 'Access-Control-Allow-Methods' 'GET, POST, DELETE, OPTIONS' always;
add_header 'Access-Control-Allow-Headers' 'Authorization, Content-Type, User-Agent' always;
add_header 'Access-Control-Expose-Headers' 'Content-Length, Content-Range' always;
}

error_page 500 502 503 504 /50x.html;
location = /50x.html {
root html;
}
}
}

以上配置中需要注意 add_header 'Access-Control-Allow-Origin' '*' always; , 将 * 替换为你自己服务器的域名。

如果你想部署 headscale-admin,以及不希望api暴露,可以在 nginx 中删除 /admin 的配置,以及 /cros 配置即可。

目的

为了加快Bing搜索引擎对网站的索引,可通过 IndexNow 主动提交网址链接。

  • 1、在 https://www.bing.com/indexnow/getstarted 获得 API key
  • 2、将 keytxt 文件放到网站根目录下,方便访问
  • 3、将网站的所有链接生成一个 txt 文档,使用脚本提交
  • 4、到 Bing Webmaster Tools 网站查看提交情况

脚本

以下是用于批量提交链接到 Bing IndexNow 的 shell 脚本:

1
2
3
4
5
6
7
8
9
10
11
12
13
14
15
16
17
18
19
20
21
22
23
24
25
26
27
28
29
30
31
32
33
34
35
36
37
38
39
40
41
42
43
44
45
46
47
48
49
50
51
52
53
54
55
56
57
58
59
60
#!/bin/bash

# === 配置参数(请根据实际情况修改) ===
HOST="www.ownding.com" # 你的域名
KEY="878777754f5740419ae123455c77d8ca" # 你的API密钥
KEY_LOCATION="http://www.ownding.com/878777754f5740419ae123455c77d8ca.txt" # 密钥验证文件URL
URL_FILE="/xxx/baidu_urls.txt" # URL文件路径

# === 检查文件是否存在 ===
if [ ! -f "$URL_FILE" ]; then
echo "错误:文件 $URL_FILE 不存在"
exit 1
fi

# === 读取并处理URL列表 ===
# 过滤空行,添加双引号,转换为JSON数组格式
URLS=$(grep -v '^$' "$URL_FILE" | sed 's/.*/"&"/' | paste -sd ',' -)

echo "-------"
echo "-------"
echo $URLS
echo "-------"
echo "-------"

# === 构建JSON请求体 ===
JSON_BODY=$(cat <<EOF
{
"host": "$HOST",
"key": "$KEY",
"keyLocation": "$KEY_LOCATION",
"urlList": [$URLS]
}
EOF
)

echo ""
echo "-------"
echo "-------"
echo $JSON_BODY
echo "-------"
echo "-------"


# === 发送POST请求 ===
echo "正在提交 $HOST 的链接..."
RESPONSE=$(curl -s -w "\n%{http_code}" -X POST "https://www.bing.com/indexnow" \
-H "Content-Type: application/json; charset=utf-8" \
-d "$JSON_BODY")

# === 解析响应 ===
HTTP_CODE=$(echo "$RESPONSE" | tail -n1)
RESPONSE_BODY=$(echo "$RESPONSE" | sed '$d')

if [ "$HTTP_CODE" -eq 200 ]; then
echo "提交成功!Bing返回:$RESPONSE_BODY"
else
echo "提交失败!HTTP状态码:$HTTP_CODE"
echo "响应内容:$RESPONSE_BODY"
exit 1
fi

baidu_urls.txt 文件中 URL格式:

1
2
3
4
5
6
7
http://www.ownding.com/2025/06/12/%E5%9C%A8%E6%9C%89%E5%85%AC%E7%BD%91IP%E7%9A%84%E6%83%85%E5%86%B5%E4%B8%8B%E5%A6%82%E4%BD%95%E5%AE%89%E5%85%A8%E5%9C%B0%E8%BF%9B%E8%A1%8C%E8%BF%9C%E7%A8%8B%E6%A1%8C%E9%9D%A2%E8%BF%9E%E6%8E%A5/
http://www.ownding.com/2025/06/12/%E5%9C%A8%E4%BA%91%E7%AB%AF%E9%81%A8%E6%B8%B8%EF%BC%8C%E4%BB%A3%E7%A0%81%E5%A6%82%E9%A3%9E%EF%BC%81%E6%9C%8D%E5%8A%A1%E5%99%A8%E8%BF%9C%E7%A8%8B%E5%BC%80%E5%8F%91%E6%8C%87%E5%8D%97/
http://www.ownding.com/2025/06/11/zlmediakit%E9%87%8D%E5%90%AF%E6%8B%89%E6%B5%81%E9%85%8D%E7%BD%AE%E4%B8%A2%E5%A4%B1%E4%B8%80%E7%A7%8D%E7%AE%80%E5%8D%95%E8%A7%A3%E5%86%B3%E6%96%B9%E6%B3%95/
http://www.ownding.com/2025/06/11/%E7%B3%BB%E7%BB%9F%E9%98%B2%E6%AD%A2%E8%BF%9C%E7%A8%8B%E6%9A%B4%E5%8A%9B%E7%A0%B4%E8%A7%A3%E6%96%B9%E6%B3%95/
http://www.ownding.com/2025/06/10/nginx%E9%85%8D%E7%BD%AEmap%E5%A4%9A%E4%B8%AA%E5%9F%9F%E5%90%8D%E8%BD%AC%E5%8F%91%E5%88%B0%E4%B8%8D%E5%90%8C%E5%90%8E%E7%AB%AF/
http://www.ownding.com/2025/06/10/ubuntu%E6%9B%B4%E6%96%B0%E6%A0%B9%E8%AF%81%E4%B9%A6/

使用说明:

  1. 将脚本保存为 submit_to_bing.sh
  2. 修改配置参数:
    • HOST: 你的网站域名
    • KEY: 你的 Bing IndexNow API 密钥
    • KEY_LOCATION: 验证密钥文件的 URL
    • URL_FILE: 你的 URL 文件路径
  3. 赋予执行权限:
    1
    chmod +x submit_to_bing.sh
  4. 运行脚本:
    1
    ./submit_to_bing.sh

在有公网 IP 的情况下如何安全地进行远程桌面连接?

Author: OwnDing

Date: 2023-12-23

我从22年3月开始到现在一直在iPad使用微软远程桌面登入云电脑进行办公,刚开始也为网络安全绞尽脑汁,还好最后总算被我找到了解决方案,而且都是免费的,不用花一分钱。

话不多说,下面介绍下我使用远程桌面的一些安全措施,请重点关注两项增强措施


基本措施

1、修改RDP的默认端口;限制administrator账号登入(我偷懒没有禁止admin账号,不过强烈建议使用其它用户名登入);使用强密码。


增强措施:

2、安装IPBan。由于远端连接的相关端口暴露在互联网会导致别人暴力破解,安装IPBan后,可以将多次登入失败的IP地址自动加入防火墙禁用。网址:GitHub - DigitalRuby/IPBan: Since 2011, IPBan is the worlds most trusted, free security software to block hackers and botnets. With both Windows and Linux support, IPBan has your dedicated or cloud server protected. Upgrade to IPBan Pro today and get a discount. Learn more at ↓

超过三次失败限制登入几分钟

3、使用Duo Security进行二次验证

Multi-Factor Authentication & Single Sign-On | Duo Security

当你输入正确的用户名、密码登入后,会出现Duo验证界面,需要你在手机上确认是否登入。

手机二次验证

手机Duo界面

Duo RDP设置界面

以上安全措施我在另一篇文章中也提过:

告别电脑,完全使用iPad(平板)进行办公、学习、娱乐的最佳方案

在云端遨游,代码如飞!服务器远程开发指南

Author: OwnDing

Date: 2024-02-25

还在为本地电脑的低配置而烦恼吗?还在为繁重的编译和运行时间而抓狂吗?快来看看服务器远程开发的解决方案吧!

服务器化开发,释放本地电脑的潜能

服务器远程开发,顾名思义,就是把开发环境搬到服务器上,本地电脑只需要负责轻量级的编辑和控制。这种方式可以大大降低本地电脑的配置要求,让即使是老掉牙的电脑也能流畅运行开发环境。

前端使用 Visual Studio Code Remote 方案,纵享云端开发的自由

Visual Studio Code Remote 是一款强大的扩展,可以将 Visual Studio Code 的开发环境扩展到远程服务器。有了它,你可以在本地电脑上编辑代码,而编译、运行和调试都在服务器上进行。

后端使用 JetBrains Gateway 方案,体验专业工具的魅力

如果你需要一个更专业的开发环境,那么 JetBrains Gateway 绝对是你的不二之选。它是一款免费的软件,不过它提供了无与伦比的功能和稳定性。有了它,你可以使用最新版本的 IntelliJ IDEAPyCharm 和其他 JetBrains 工具,在服务器上进行开发。

Gateway支持的IDE

Gateway 最大优点是可以使用VPN远程到服务器内网,也可以稳定运行调试编写代码,让你在任意地方随心所欲的编程。

缺点是需要付费IDEA使用。

我使用JetBrains Gateway有数个月时间了,代码及后端计算均在服务器上完成,本地电脑上主要就是一个显示、编辑操作,对电脑性能要求低。此外,现阶段的Gateway稳定性较之前版本有很大的提升,此外你无需将代码下载到本地电脑,这样也保证了代码的安全性。

Gateway界面

如果你想了解更多关于服务器远程开发的信息,可以访问以下链接:

好了,以上就是关于服务器远程开发的全部内容了。希望对你有帮助!

ZLMediaKit 重启后拉流配置丢失一种简单解决方法

问题背景

ZLMediaKit 在服务重启后可能会出现已配置的拉流任务丢失的问题。本文提供一种通过 API 自动恢复拉流配置的解决方法。


解决方法概述

  1. 使用 jq 工具解析 JSON 配置文件
  2. 通过 Shell 脚本调用 ZLMediaKit API 批量恢复拉流任务
  3. 配置开机自启动实现自动化恢复

实施步骤

1. 安装 jq 工具

1
2
3
4
5
6
7
8
# Ubuntu/Debian 系统
sudo apt-get install jq

# CentOS/RHEL 系统
sudo yum install jq

# 验证安装
jq --version

2. 创建流配置文件 streams.json

将需要持久化的拉流配置保存为 JSON 格式:

1
2
3
4
5
6
7
8
9
10
11
12
13
14
15
16
17
18
19
20
21
22
23
[
{
"vhost": "192.168.16.10",
"app": "live",
"stream": "xxx225",
"url": "rtsp://admin:admin@192.168.11.225:554/h266/ch1/main/av_stream",
"secret": "CCCOuGTsZG7EZoHtt1l6HUmbBW6xP4ri"
},
{
"vhost": "192.168.16.10",
"app": "live",
"stream": "xxx224",
"url": "rtsp://admin:admin@192.168.11.224:554/h266/ch1/main/av_stream",
"secret": "CCCOuGTsZG7EZoHtt1l6HUmbBW6xP4ri"
},
{
"vhost": "192.168.16.10",
"app": "live",
"stream": "xxx223",
"url": "rtsp://admin:admin@192.168.11.223:554/h266/ch1/main/av_stream",
"secret": "CCCOuGTsZG7EZoHtt1l6HUmbBW6xP4ri"
}
]

⚠️ 注意事项:

  • 确保字段与 ZLMediaKit API 文档要求一致
  • 敏感信息建议设置文件权限:chmod 600 streams.json
  • 建议将文件存储在安全目录(如 /etc/zlmediakit/

3. 创建恢复脚本 restore_zlmediakit.sh

1
2
3
4
5
6
7
8
9
10
11
12
13
14
15
16
17
18
19
20
21
22
#!/bin/bash

# 检查 jq 是否安装
if ! command -v jq &> /dev/null; then
echo "错误:jq 未安装,请先执行安装步骤"
exit 1
fi

# JSON 文件路径
CONFIG_FILE="/path/to/streams.json"

# API 地址(根据实际环境修改端口)
API_URL="http://127.0.0.1:8080/index/api/addStreamProxy"

# 读取配置并逐条添加
jq -c '.[]' "$CONFIG_FILE" | while read -r item; do
curl -s -X POST "$API_URL" \
-H "Content-Type: application/json" \
-d "$item"
done

echo "拉流配置恢复完成"

📝 使用说明:

  • 修改 CONFIG_FILE 为实际存储路径
  • 确认 API_URL 的端口号与配置文件一致
  • 添加执行权限:chmod +x restore_zlmediakit.sh

4. 配置开机自启动

方法一:通过 crontab

1
2
3
4
5
# 编辑 crontab
crontab -e

# 添加以下内容(注意修改脚本实际路径)
@reboot /absolute/path/to/restore_zlmediakit.sh >> /var/log/zlmediakit_restore.log 2>&1

方法二:创建 systemd 服务

1
2
3
4
5
6
7
8
9
10
11
12
# /etc/systemd/system/zlmediakit-restore.service
[Unit]
Description=ZLMediaKit Pull Stream Restorer
After=network.target

[Service]
ExecStart=/absolute/path/to/restore_zlmediakit.sh
User=your_user
Environment="PATH=/usr/bin:/usr/local/bin"

[Install]
WantedBy=multi-user.target
1
2
# 启用服务
sudo systemctl enable zlmediakit-restore

验证与维护

手动测试脚本

1
2
./restore_zlmediakit.sh
# 检查返回结果或查看 ZLMediaKit 日志

查看运行状态

1
2
3
# 如果使用 systemd
systemctl status zlmediakit-restore
journalctl -u zlmediakit-restore

日志分析

  • 默认日志路径:/var/log/zlmediakit/
  • 关注 API 返回状态码(200 表示成功)

注意事项

必须验证项

  • ✅ ZLMediaKit API 端点地址和端口
  • ✅ 流媒体服务器 IP 地址是否固定
  • ✅ 网络策略是否允许本地回环访问(127.0.0.1)

安全加固(可选)

1
2
3
4
# 设置脚本权限
chmod 700 restore_zlmediakit.sh
# 设置配置文件权限
chmod 600 streams.json

原理:读取系统相关登入、安全日志,调用防火墙禁止频繁登入失败的IP。

0%